SnipTag for Batch Cropping Scanned Photos
SnipTag for macOS features a powerful tool named Snip for batch cropping dozens of scanned photos at a time. When you’re working on a big scanning project, it can save you countless hours of grunt work.
Like any tool, Snip must be used correctly to produce the desired results. This short, illustrated tutorial provides all the tips you need.
How to Scan Photos
You can scan photos using any digital camera or scanner. DSLR and mirror-less cameras usually offer 50MP or higher resolution. Even compact cameras can take 15-20MP photos. Current iPhones and iPads have 12MP cameras, while some Android phones go up to 30MP. If you have a desktop scanner, printer-scanner or handheld/wand scanner, that’s great, too.
- When scanning loose photos, scan 3-4 photos at a time. SnipTag can crop up to eight photos per scan, but it’s better to avoid crowding too many in one scan.
- When scanning album pages, pay close attention to the auto-cropping tips listed below.
- When using a scanner, set the PPI (some insist on calling it DPI) at 200 or higher. JPG or PNG formats are ideal for most purposes. If scanning for professional use, making huge reprints, or sophisticated editing, TIFF format may be more suitable. SnipTag can handle all of these.
If scanning with a digital camera or smartphone, turn off the flash and scan in indirect natural daylight. Electric light or flash may cause glare, shadows and reflections. If you have a tripod for the camera or locker shelf to place the smartphone on, use it for hands-free scanning (Avoids blurry scans due to camera shake.)
Workflow for Scanning
Sort and arrange photos in the order in which you want to scan them. This may be chronological (e.g. all photos taken during a year or decade), by location (all photos taken during a vacation), by event (all photos taken at a wedding), or in any other way you like.
After batching the photos, scan four or fewer photos per click. Once the entire batch is done, save all the scans in a folder on your Mac. Now you may either proceed to crop them with Snip, or scan more batches.
Scanning Photos Correctly
For accurate batch cropping of your scans, follow these simple rules:
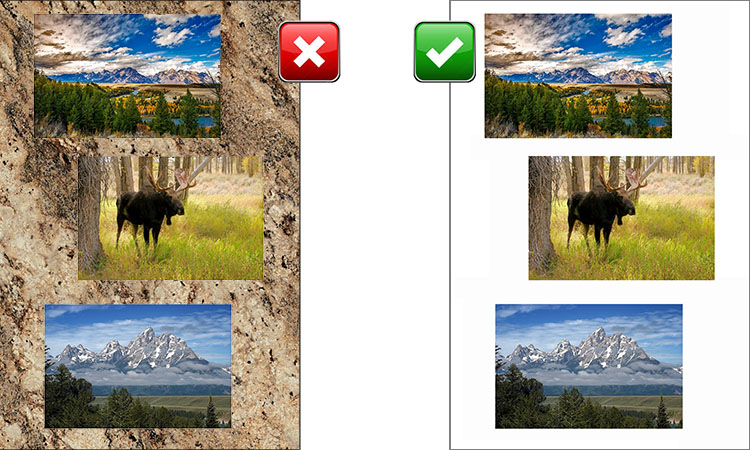
1) Place photos on a white or solid colored background. Not on multi-color or textured background, which makes edge detection difficult.
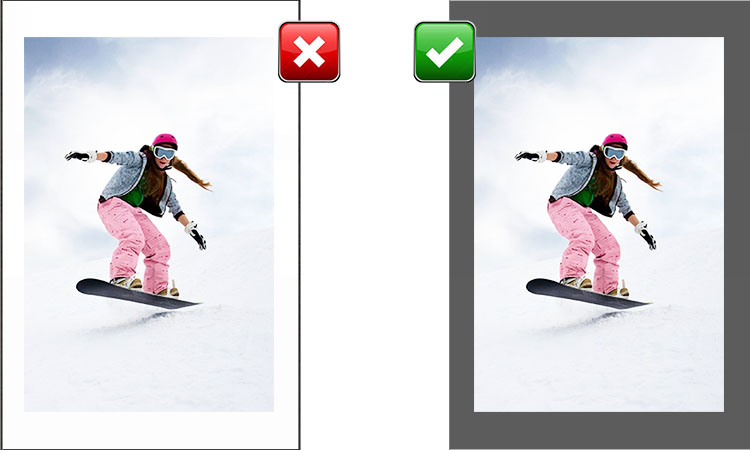
2) Ensure some contrast between the photos’ edges and the background color. For example, for a snow-scape, avoid white background. This helps the program detect where the photo ends and the background begins.
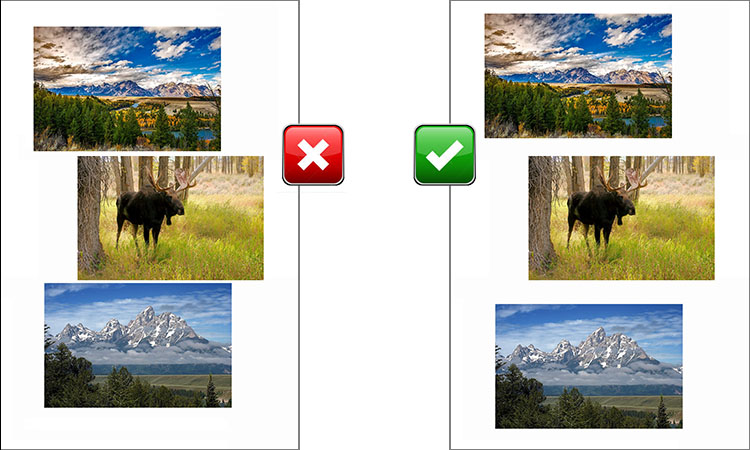
3) If scanning multiple photos at a time, keep 1 to 2 cm gap between them. This is extremely important. In the example on left below, there’s very little gap between the photos:
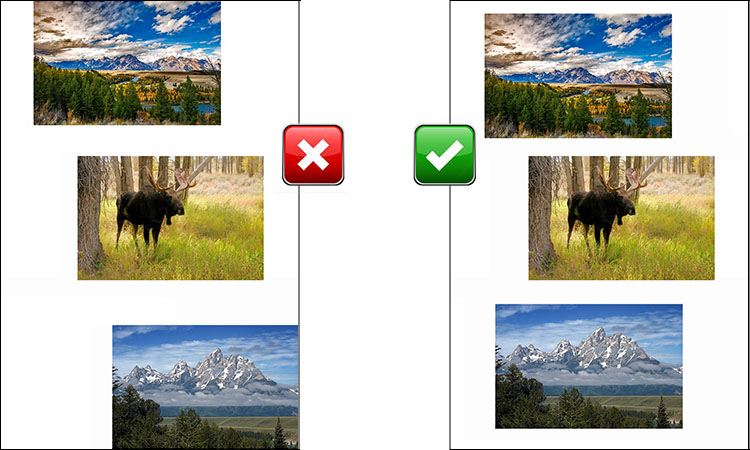
4) Also very important: Ensure that the photo(s) lie fully within the frame, with a bit of background visible on all four sides (In the example on below left, the photos on top and bottom extend right up to the scan’s borders. The scan on right is good, as you can see a bit of white on all 4 sides):
Now for the Magic: Batch Cropping
When you have saved one or more batches of scans, it’s time to get them cropped. Launch SnipTag and check that you are in Snip mode. If you’re in Tag mode, use the Snip vs. Tag selector on top left to switch to Snip. Import a batch of scans into the left pane of the screen, and all your photos will be detected, cropped and saved in the right pane. In just a few seconds!
A Couple of Bonus Tips
SnipTag has 2 batch cropping engines: Apple Vision (default) and Computer Vision (secondary). You can toggle between them via SnipTag > Preferences. Scan according to the above rules, then you can try both and see which engine works better for you.
Click Help > ‘Sample scans to test Snip’ in SnipTag’s top menu. The sample scans are all made in accordance with the above rules – so you can get a good idea of how to arrange your scans.
Learn more tips and tricks in SnipTag app’s blog.