Scanning photos? Don’t forget image metadata
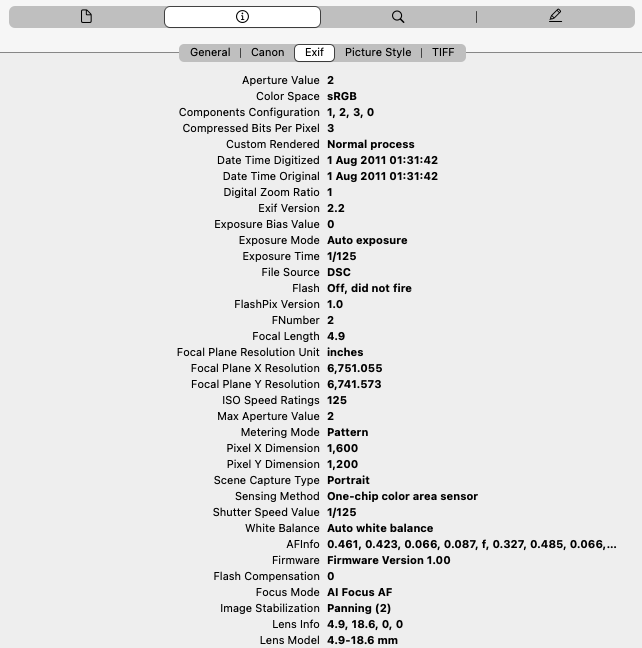
Digital photos captured with your iPhone or DSLR camera contain a lot of embedded information. This includes date and time, location, pixel dimensions, focal length, aperture, exposure – and much more. This is called EXIF metadata, and you can easily check it for any photo. Open it with the Preview app on your Mac; click Tools, Show Inspector, EXIF, and you’ll see something like this:

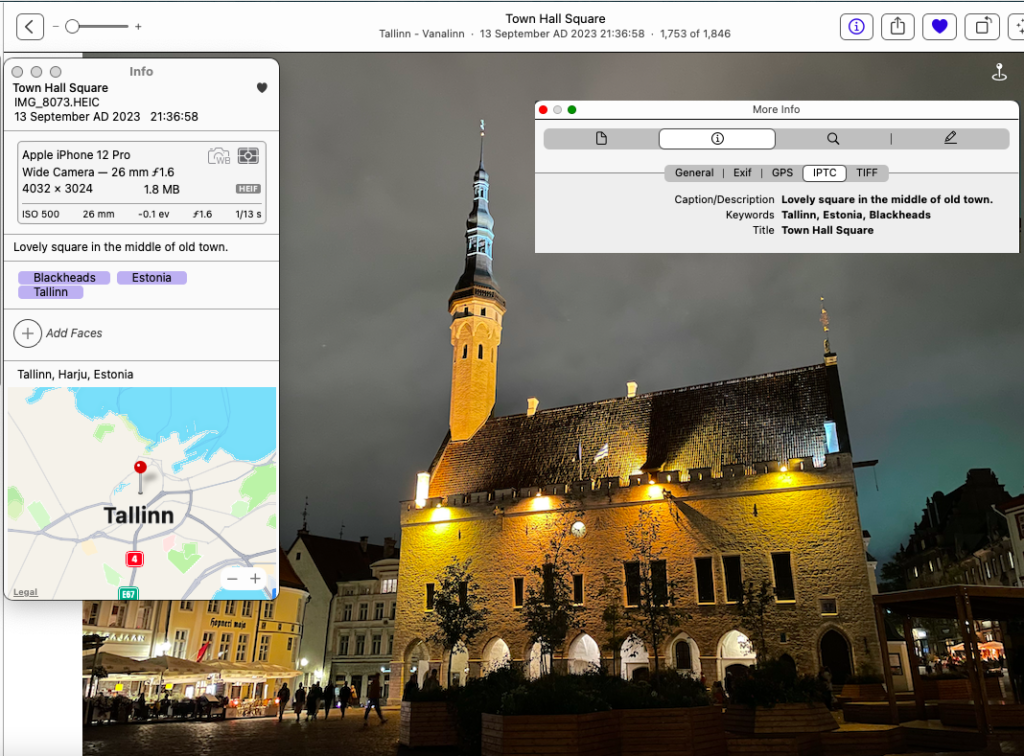
You can also add your own notes, e.g. description, title, keywords etc., with Mac Photos or with more powerful image metadata editors. This is IPTC metadata, the digital equivalent of penciling notes behind printed photos:

Why is image metadata important?
Together, EXIF and IPTC metadata can tell the complete story of your photo. The great thing about EXIF and IPTC metadata is that it “travels” with photos when you transfer them across programs, computers and devices. When you organize photos in digital collections, e.g. in Apple Photos, Flickr etc., these programs use Date/Time Taken to arrange the photos chronologically. Their search functions use location, keywords etc. to help you quickly find the photos you want.
What about scanned photos?
When you scan photos with a desktop scanner or a mobile app, image metadata shows the scanning date instead of the actual date. Likewise, it shows the scanning location instead of the actual locale. As a result, when you import your great grandmother’s wedding portrait into the Photos app, it might appear alongside your family’s 2024 vacation pictures. Geographical coordinates, too, are wrong. At the bare minimum, you need to fix the date and location.
To make scanned photos easily discoverable in your rapidly growing collection of digital photos, you should also give the photos recognizable file names (e.g. rename IMG_0588.jpg as Gran’s Wedding 1952), and add descriptions and keywords.
Professional photographers may also want to add copyright assertion information and other details.
Image metadata editors’ capability vary considerably. You should take into account these factors when choosing a metadata editor:
- What image metadata info (fields) do I need, and does the software support it all?
- Does the software put the metadata in correct IPTC fields or in XMP sidecar files?
- Does it allow batch-editing of metadata? (Important if you have hundreds of photos)
SnipTag for Mac – Powerful and Easy
The macOS app SnipTag bundles two powerful tools:
- Snip for batch-cropping multiple photos scanned together
- Tag for batch-editing and viewing image metadata
Many modern scanners include bundled software for automatically detecting and cropping photos from scans. This is much faster than manually cropping dozens, possibly hundreds of scans. If you don’t have such a scanner, try Snip. Place 3-5 photos on the scanner glass (slightly separated), scan and save in a folder on your Mac. Repeat. Once you have scanned everything, just drag and drop the entire batch of scans in SnipTag. Snip will crop and save them individually in a couple of seconds.
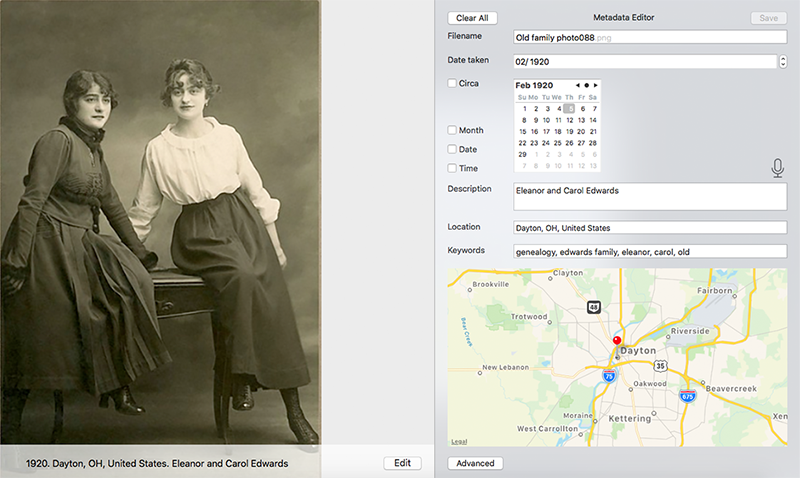
Tag is a powerful way to add or edit image metadata, and it’s very easy to use. You can use it for scans you cropped with Snip, or import scans or photos from your Mac. Switch to the app’s Tag window. Pick one or multiple photos, and populate the fields you want. You can also change filenames.
A bonus feature in SnipTag
A unique feature of SnipTag: It can take the date, location and description you input and imprint it below the photos. Like this:

You can view or print photos with or without captions overlaid. That’s pretty cool!
Image metadata is a crucial part of preserving your photo history. We piece together the stories behind old photos by reading the notes our ancestors scribbled behind them. The metadata you create today could similarly help future generations fifty or seventy years down the road!